To change your computer's IP address in the way that Gridworks IT recommends, follow these steps that demonstrate where you will need to go.
___________________________________________________________________
- To start, use the bottom-left "Search" bar along the Windows 11 taskbar to type "control", and click the "Control Panel" result.

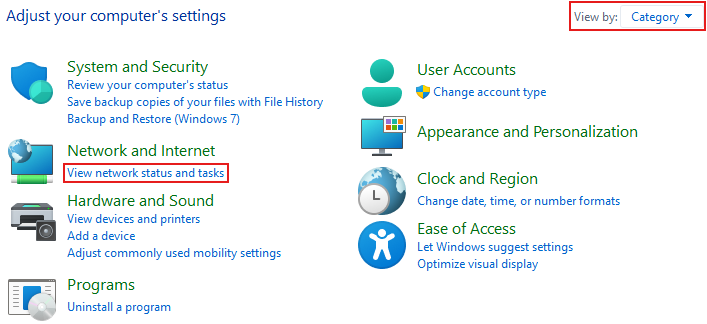
- With the Control Panel open, first set your "View by: " option to "Category." Once that's set, click on the blue text that says "View network status and tasks," directly underneath the "Network and Internet" category.
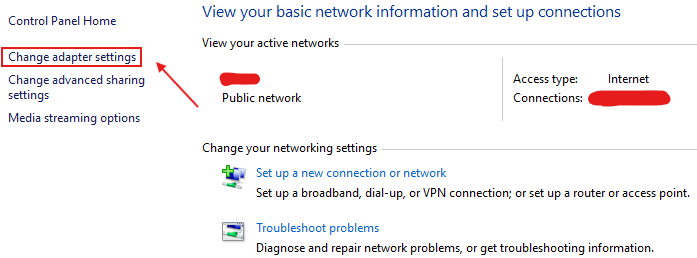
- Within the Network and Sharing Center, click "Change Adapter Settings" along the left-hand pane of the window.
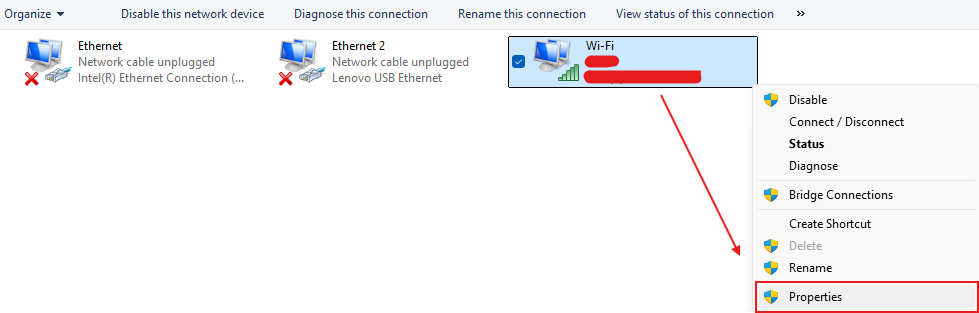
- A "Network Connections" window will open. If you'll be using an ethernet cable to facilitate the connection to the field infrastructure, right-click on the "Intel(R) Ethernet Connection" option > Properties. If you will not be using an ethernet cable connection, right-click on the Wi-Fi network adapter > "Properties."
- A User Account Control (UAC) prompt, similar to what's shown below (minus the "Email address" line), will open and request administrative credentials to be entered to authorize you into this network adapter's "Properties" window.
Ensure the requested user's password is your password, and not the "localadmin" password. It will state this above and below the password text box. Enter in the same login password you use to access your computer's desktop when it boots up, and it will let you through.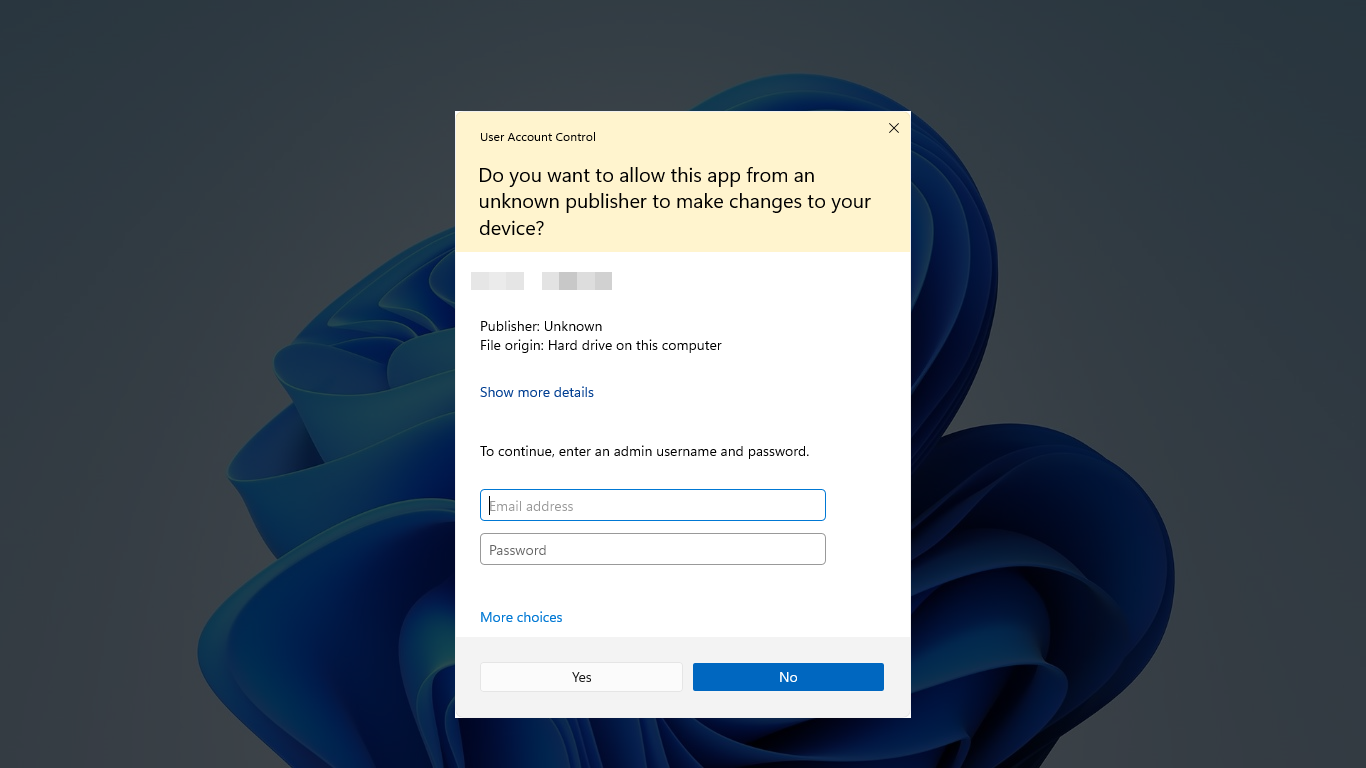
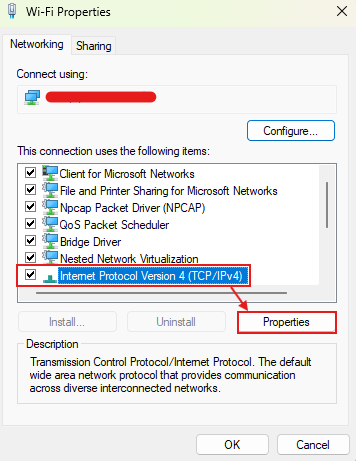
- In the Ethernet or Wi-Fi "Properties" window, search through the center field for "Internet Protocol Version 4 (TCP/IPv4). When you find this, click it and then click on the "Properties" button right underneath this field.
- In the "Internet Protocol Version 4 (TCP/IPv4) Properties" window, you will want to change the default selection of automatically obtaining an IP address and DNS server address to "Use the following..." Once changed, the text boxes will open to allow you to set and choose an IP address, subnet mask, default gateway, and relevant DNS server addresses.
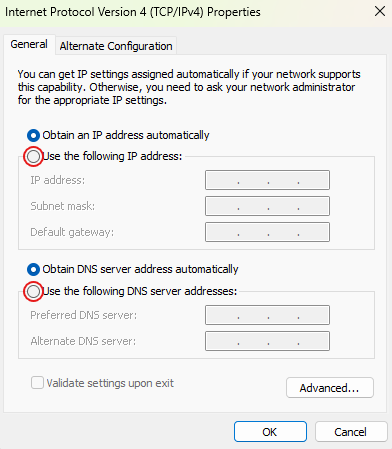
- Double check the relevant equipment's documentation to ensure the network information is set to what you need it set to. Once confirmed, click the "OK" button at the bottom of the window. After you have set this IPv4 configuration, your device's IP address has been changed.
- Optional: If you are using an ethernet connection, you may find it helpful to temporarily disable your Wi-Fi network adapter to ensure it doesn't take priority in the system over the ethernet adapter, which could cause network connection issues. To do this, go to the Control Panel page you were at on Step 4, and right-click the Wi-Fi network adapter > Disable.
- When you are finished with your tasks, be sure to revert the relevant network adapter's IPv4 settings back to DHCP. This can be done by going to the IPv4 properties page in step 7, and setting both options back to "Automatically obtain" an IP and DNS server. This will ensure you don't encounter any network issues on your computer once you leave the site location.
Reach out to your IT Department for assistance if you run into any roadblocks, errors, or other issues getting this changed.
Was this article helpful?
That’s Great!
Thank you for your feedback
Sorry! We couldn't be helpful
Thank you for your feedback
Feedback sent
We appreciate your effort and will try to fix the article